All guides+
Free plugin
Getting started
Install Kavin DPDP Cookie Consent, add your tracking tools and fill in your notice details.
Kavin DPDP Cookie Consent holds back analytics and advertising tags on your WordPress site until each visitor agrees. It is built for India's Digital Personal Data Protection Act, 2023, which asks for consent that is free, specific and as easy to withdraw as to give.
This plugin helps you meet the DPDP Act's consent requirements. It is not legal advice, and your privacy notice must still describe what your site actually does.
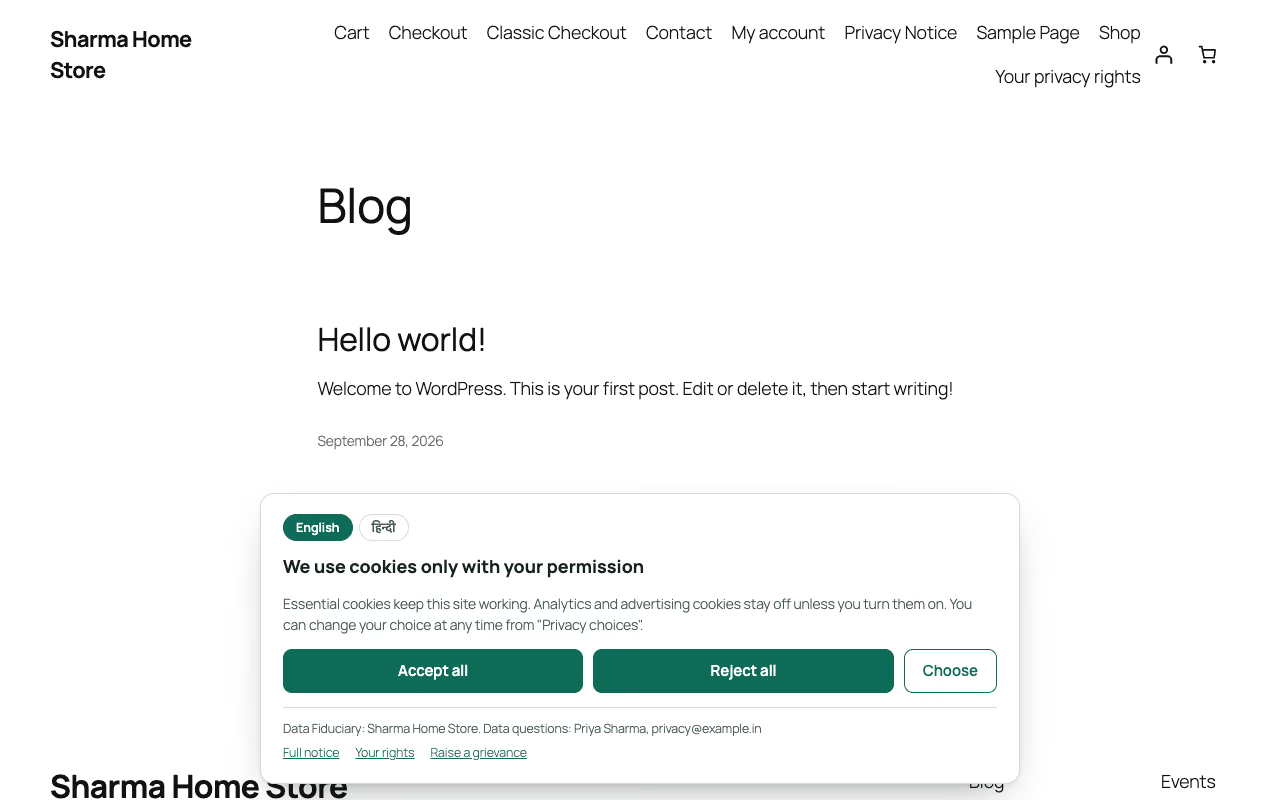
What happens on your site
- On the first visit, nothing optional loads. Google Consent Mode v2 is set to "denied" before any tag can run.
- The banner offers Accept all and Reject all with equal weight, plus Choose, which opens a switch for Analytics and one for Advertising.
- Each category lists the tools it covers, what they collect, their cookies, how long they are kept and who receives the data.
- Tags load only for the categories the visitor allows. Allowing Analytics does not allow Advertising.
- A Privacy choices button stays on every page, so visitors can change or withdraw their choice at any time. Withdrawing deletes that category's cookies.
- Every choice is saved as a consent record with the time and notice version. No name, email or raw IP address is stored.
Requirements
- WordPress 5.7 or later
- PHP 7.2 or later
Set it up
- Upload the plugin and activate it.
- Go to Kavin Studios → DPDP Consent.
- On the Tracking tools tab, enter the IDs of the tools you want the plugin to load. Or leave the switch Hold back known tracking tags until the visitor agrees on, so tags added by other plugins wait for consent.
- Click Scan my site now to find tags that your theme or other plugins add.
- On the Banner and notice tab, choose your Privacy notice page and enter your Grievance contact email. Also fill in Business responsible for the data.
- Click Save banner and notice.
- Open your site in a private window to see the banner.
You can also use the preview the banner link on the Banner and notice tab. It opens your home page with the banner showing, even if you have already made a choice.
The settings screen
The screen at Kavin Studios → DPDP Consent has these tabs:
| Tab | What you do there |
|---|---|
| Tracking tools | Enter tool IDs, hold back other tags, scan your site. See Tracking tools. |
| Banner and notice | Wording, layout, colours, Hindi, your privacy notice details. See Banner and notice. |
| WooCommerce | Marketing choices at checkout. Shown only when WooCommerce is active. See WooCommerce. |
| Consent records | Every choice visitors made, with CSV export. See Consent records. |
If the Kavin Studios menu is not present, the plugin adds its own DPDP Consent menu item instead. You can also reach the screen from the Settings link under the plugin on the Plugins screen.
If your site has no tracking
With no tracking tools configured or found, no banner is shown. The form notice shortcode still works. See Shortcodes.
Kavin DPDP Cookie Consent Pro
The free plugin is complete on its own, and nothing in it is locked. Kavin DPDP Cookie Consent Pro is a separate, paid plugin that adds four tabs to the same screen:
- Languages: the banner in all 22 languages of the Eighth Schedule.
- Privacy notice: a notice page built from what your site actually does.
- Requests: a privacy request form with a response clock.
- Re-notice: notice emails to people whose data you already hold.
Pro needs the free plugin installed and active.